Precautions for Installing LED Solar Street Light
2021-06-01
VIEW "3145
Speaking of street lights, everyone knows that street lights are mainly used for road street lighting. Traditional street lights use mains electricity. City circuit lights are not only complicated to install, require high electricity and maintenance costs with potential safety hazards. Solar energy street lights are favored by more and more people, led solar street lights gradually replace city circuit lights. This energy-saving and environmentally friendly product has attracted the attention of the whole society as soon as it is launched. LED solar street lights use sunlight as energy. Solar panels charge the battery during the day and power the lamp at night. No need for expensive pipeline laying, the layout of the lamps can be adjusted arbitrarily, safe, energy-saving and pollution-free, stable, and reliable without manual operation, saving electricity and no maintenance. We will introduce the composition and working principle as well as precautions for installing LED solar street light in this article.
I. The composition and working principle of led solar street lights
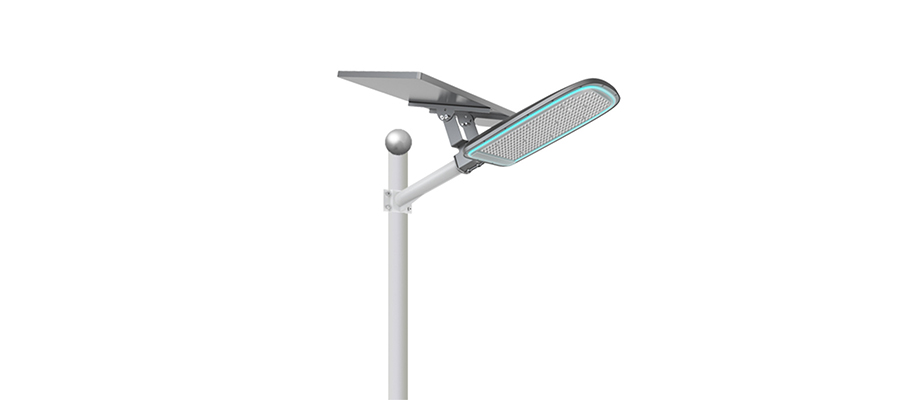
Led solar street lights are mainly composed of solar panel components, intelligent controllers, battery packs, light sources, light poles, etc.
LED solar street lights use solar panels to convert solar radiation into electrical energy during the day, and then store the electrical energy in a battery through an intelligent controller. When night comes, the sun light gradually decreases. When the intelligent controller detects that the illuminance decreases to a certain value, it controls the battery to provide power to the solar lamp, so the light source will automatically turn on when it is dark. The intelligent controller protects the charging and over-discharge of the battery, and controls the turn-on and lighting time of the light source.

II. Precautions for installing led solar street lights
1. Foundation pouring
Determine the position of the standing light:
Inspect the geology, if the surface of the ground is soft soil at 1.2 meters, the excavation depth should be deepened (the north is generally frozen soil above 50 cm, so it is recommended that the depth of the pit is 1.2 to 1.5 meters. If this is not done, the temperature of the battery can be maintained throughout the year. Around 25 degrees);
Make sure that there are no other facilities (such as cables, pipes, etc.) below the excavation location.
There is no long-term sun-shading object on the top of the solar street lamp, otherwise the position should be changed appropriately.
Embedding of embedded parts:
Reserve (excavate) a 1.3-meter pit that meets the standard at the position of the vertical lamp; perform positioning and pouring of the pre-embedded parts.
The embedded part is placed in the center of the square pit, one end of the PVC threading pipe is placed in the middle of the embedded part, and the other end is placed in the storage area of the battery.
Be careful to keep the embedded parts, the foundation, and the original ground on the same level (or the top of the screw is on the same level as the original ground, depending on site needs), and one side must be parallel to the road; this will ensure that the rear end of the light pole is erected.
Use C20 concrete to pour and fix. Do not stop using the vibrator to vibrate during the pouring process to ensure the overall compactness and firmness.
After the construction is completed, promptly clean up the remaining sludge on the positioning plate, and clean the impurities on the bolts with waste oil.
During the concrete solidification process, water should be regularly watered for curing; the chandelier can only be installed after the concrete has completely solidified (generally more than 72 hours).
2. Solar cell module installation
Before connecting the positive and negative poles of the battery assembly to the controller, measures must be taken to avoid short-circuiting;
When connecting the solar cell module and the bracket, it must be firm and reliable;
The output wire of the module should be avoided exposed and fastened with a cable tie;
The orientation of the battery pack should face due south, whichever is the direction of the compass.
The angle between the bracket and the horizontal plane is subject to the latitude of the installation location, or it can be adjusted by ±5 degrees on the basis again.
3. Battery installation
When the battery is placed in the buried box, it must be handled with care to prevent damage to the buried box;
The connecting wires between the batteries must be bolted on the battery terminals and copper gaskets should be used to enhance the conductivity; It is recommended to use batteries with wires when buried in the ground
After the output line is connected to the battery, it is forbidden to short-circuit under any circumstances to avoid damage to the battery;
When connecting the output wire of the battery to the controller in the telegraph pole, it must pass through a PVC threading pipe;
After the above is completed, check the wiring at the controller end to prevent short circuits. Close the door of the control box when it is normal.

4. Lamp installation
Equipment fixed:
The solar panel is fixed on the solar panel support
Fix the lamp cap to the arm, then fix the bracket and arm to the main pole, and thread the connecting wire to the control box.
Test work before lifting the pole
Check whether the solar panel, bracket lamp holder, etc. are firm
Whether the lamp holder is installed correctly and whether the light source works normally.
Whether the simple debugging system works normally:
Pay attention to safety precautions when lifting one of the light pole. After the second light pole is erected, if you find that the component's sun-facing angle is deviated, you need to adjust its sun-facing direction to completely face south.
Put the battery into the buried box, and connect the connecting wire to the controller according to the technical requirements
First: Connect the battery controller, the battery indicator on the controller is on
Second: Connect the solar panel to the controller again, and the solar indicator light on the controller is on;
Third: Connect the load last
Fourth: During the wiring operation, you must pay attention to the wiring of each circuit and the wiring terminals marked on the controller. The positive and negative polarities cannot collide or be connected reversely; otherwise, the controller may be damaged.
Check whether the system works normally
When there is light during the day, loosen the solar panel connection cable on the controller, and the light will be on (usually unplug the solar cable for 5 to 10 minutes);
Connect the solar panel cable, the light went out;
When performing the above operations, observe the changes of the indicators on the controller; Seal the control box unless the light works normally.
If you are familiar with the controller operation, some solar street lamp manufacturers have manual debugging mode for the controller, you can directly test the equipment.

